
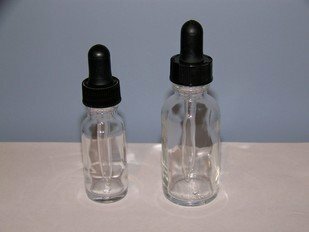
We talk a lot about how to make the best DIY vape
juice in terms of flavor, balance of VG/PG and nicotine strength, while making
sure that each ingredient is as high in quality as possible. But, rarely do we talk about the bottles that
are involved in the DIY
vaping process – especially the importance of cleaning them. Cleaning your DIY bottles is absolutely
essential, and fortunately for DIY vapers, pretty easy as well.
Why is Cleaning Your DIY Bottles So Important Anyway?
DIY vape juice bottles are understandably an essential
part of a vaper’s DIY vaping setup, as without them, you’d have nothing to put
your e-liquids
into. Bottles large and small must be
cleaned regularly to keep them both safe to use and looking their best. Bottles do get dirty due to exposure to
flavoring ingredients that affect the color and clarity of the bottles, with
more sugary e-juices causing a layer of gunk to build up on the inside
surface. Meanwhile, any bottle that is
handled regularly can develop germs that can be harmful to us.
Another important reason to clean your bottles is that
if you fail to do so, they can carry traces of the previous ejuice’s flavor
profile that interferes with the new flavor that you are trying to develop.
How Often Should You Clean Those Bottles?
You should clean your DIY bottles as soon as you
receive them, as they can accumulate various particles while sitting on the
manufacturer’s shelf. After that, you
should clean them thoroughly between each use so that they are always
completely fresh.
What Not to Do When Cleaning Vape Bottles
Before we talk about how to clean your bottles
properly, let’s talk about what you shouldn’t do.
#1: DO NOT Use Abrasive Materials
First, whether you have glass or plastic bottles, you
should avoid very abrasive materials.
These scratch the material which can allow gunk to seep into the cracks,
thus being harder to clean later on.
Further, too much scrubbing of plastic can eventually cause tears in the
material.
#2: DO NOT Use Strong/Dangerous Chemicals
Never use harsh cleaners when cleaning your
bottles. Avoid bleach and other commonly
used household cleaners, as these contain caustic and sometimes extremely
dangerous compounds that can get into your vape juice formula and wreak havoc
on the body when inhaled.
#3: DO NOT Put Them in the Dishwasher
Both the plastic and glass materials used for DIY
bottles may not be dishwasher-friendly due to their temperature resistance
and/or thickness level of material.
How to Properly Clean Your DIY Bottles
Our favorite cleaning method for DIY bottles can be
used for both glass and plastic bottles and uses only safe cleaning materials
while cleaning the bottles effectively.
Step #1: Fill
your DIY bottles with warm water.
Step #2: Place
a pinch of salt into each bottle, along with a few drops of isopropyl alcohol.
Step #3: Place
the lid onto each bottle and shake each one for about 30 seconds. This will help break up any debris or gunk.
Step #4: Remove
each cap and empty.
Step #5: Fill with hot
water and pour out. Do this as many
times as necessary until each bottle looks completely clean.
Overall, those DIY vape bottles can last for a long
time, but if they’re not cleaned after each use, they may become dirty, grimy
and even unhygienic. Luckily, it’s easy
to clean those vape bottles using the method above, which takes only minutes to
pull off so that you can use your bottles once again.
Leave a Reply