
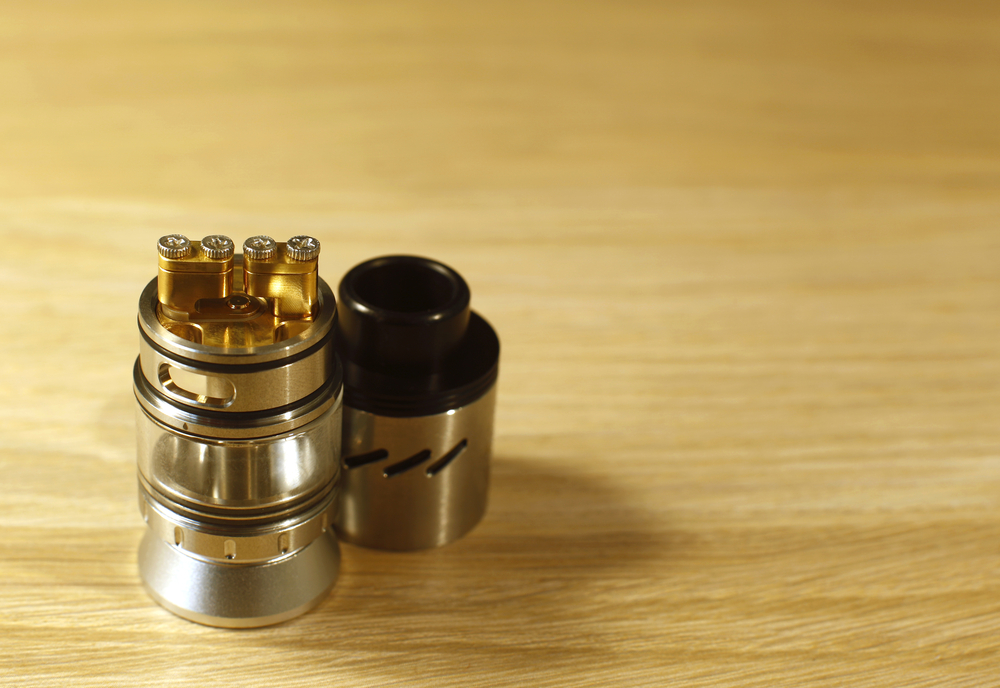
 A rebuildable dripping tank atomizer
(RDTA) is a popular device among vaping enthusiasts because
it combines the benefits of a rebuildable dripping atomizer (RDA) and a tank
atomizer. RDTAs offer a great blend of flavor and vapor production. Essentially, users can build their own coils,
customize their setup, and enjoy longer vaping essions than with a standard
RDA before needing to refill. However,
like any type of hardware, they can sometimes run into problems. And, that’s why we are going to cover some general
tips for common problems you might experience with your RDTA.
How Can a Rebuildable Dripping Tank Atomizer Break?
Like all vaping hardware, RDTAs are subject to wear
and tear, potential misuse, and manufacturing defects, which can lead to them
breaking or malfunctioning. Here are
some reasons why an RDTA might break:
1.Material Fatigue:
Constant heating and cooling can weaken the metal and plastic components over
time, causing them to break or malfunction.
2.Dropping or Physical Damage:
Accidentally dropping the RDTA can damage the glass tank, the posts, or other
components.
3.Over-tightening:
Over-tightening screws or fittings can strip threads or damage seals, leading
to leaks or connection problems.
4.Improper Cleaning:
Using harsh chemicals or not fully drying the components can lead to corrosion
or damage.
5.Incorrect Coil Builds:
Building coils that are too large, or using the wrong type of wire, can cause
shorts or place undue stress on the device.
6.E-liquid Composition:
Certain e-liquids, especially those with high citrus or cinnamon content, can
be corrosive to some materials or degrade rubber seals.
7.Wear and Tear:
O-rings and seals can wear out over time, leading to leaks or airflow issues.
8.Manufacturing Defects:
Sometimes, issues arise from manufacturing defects, which might not be evident
immediately after purchase.
9.Connection Issues:
The 510 connection (or other connections in some models) can wear out or become
damaged, leading to poor conductivity or misalignment.
10.Electrical Issues:
If there’s a short or another electrical issue, it can damage the device or
even be a safety hazard.
11.Clogged Airflow:
Over time, accumulated residue from e-liquid can clog the airflow, affecting
performance or even causing the device to malfunction.
12.Thermal Expansion:
Materials expand and contract with temperature changes. Constant heating and
cooling can lead to parts becoming loose or not fitting as they should.
How to Fix an RDTA
Whether you’re dealing with leaks, poor flavor, or
something else, here’s a step-by-step guide to troubleshoot and fix common RDTA
issues:
1.Disassemble the RDTA
- Before starting, ensure your hands and the
atomizer are clean. - Take apart all the components, including
the build deck, tank section, top cap, and drip tip.
2.Inspect for Visible Damage:
- Check all parts, especially the O-rings,
for wear or damage. - Damaged O-rings can cause leaks. Replace
any damaged components.
3.Cleaning:
Clean all parts using warm water and a
mild detergent.
A soft brush or old toothbrush can help
remove any stubborn e-liquid residue.
Rinse thoroughly and allow all parts to
air dry completely.
4.Check the Coil Build:
Ensure the coils are installed evenly and also,
are not touching any part of the build deck other than the terminals.
Check for hot spots by firing the coils at
a low wattage. They should glow evenly
from the inside out.
Adjust and strum the coils as necessary to
remove any hot spots.
5.Wicking:
The wicking process is crucial for RDTAs. Improper wicking can lead to leaks or dry
hits.
Use organic cotton or your preferred
wicking material.
Ensure the cotton is snug but not overly
tight within the coil.
Trim the cotton so that it just touches
the bottom of the tank. It shouldn’t be
too long or too short.
Fluff out the ends of the cotton to
enhance capillary action.
6.Reassemble and Fill:
Once you have re-wicked, reassemble the
RDTA.
Fill the tank with e-liquid, ensuring not
to overfill it either.
7.Check the Airflow:
If you’re getting spit-back, reduce the
amount of e-liquid on the wicks or adjust the airflow to be more open.
For a tighter draw and more intense
flavor, close off some of the airflow.
For a looser draw and more cloud
production, open up the airflow.
8.Screw Everything Tightly (But Not Too
Tight):
- Ensure the build deck, tank section, and
top cap are all securely fastened. - Over-tightening can damage O-rings or
threads, but everything should be snug to prevent leaks.
9.Check the 510 Pin:
- The 510 pin on the bottom of your RDTA
should be secure. - If it’s loose, it can cause connection
problems with your mod.
Note: Before taking a
full drag, take a few short puffs to ensure everything is working correctly. Monitor for leaks, flavor quality, and vapor
production. Now, if, after all these
steps, you’re still experiencing problems, it might be a more intricate issue,
or the RDTA might be faulty. Consider reaching out to the manufacturer or
consulting a local vape shop for more specialized assistance.
There is Hope Yet to Fixing Your RDTA!
Overall, if you’re unfamiliar with building and
maintaining an RDTA, it’s always a good idea to do research, watch tutorials,
or seek advice from experienced vapers. Proper knowledge and maintenance can extend
the lifespan of the device and ensure a safe vaping experience.
To prevent or mitigate these issues:
- Handle
the RDTA with care to avoid drops or impacts. - Clean
the device regularly using appropriate methods. - Ensure
you’re using the correct coil builds and materials for your device. - Periodically
check and replace worn out parts, like O-rings and seals. - Avoid
over-tightening parts. - Store
the device in a safe, cool, and dry place when not in use.
Leave a Reply