
 Vaping has become a popular alternative to smoking,
offering a variety of devices
and customization options for enthusiasts. Among the essential tools for
advanced vapers is an ohm/volt
reader. This device is crucial for ensuring safety,
enhancing performance, and maximizing the vaping experience. In this blog,
we’ll delve into the importance of using an ohm/volt reader, its benefits, and
a step-by-step guide on how to use it effectively.
Understanding Ohm/Volt Readers
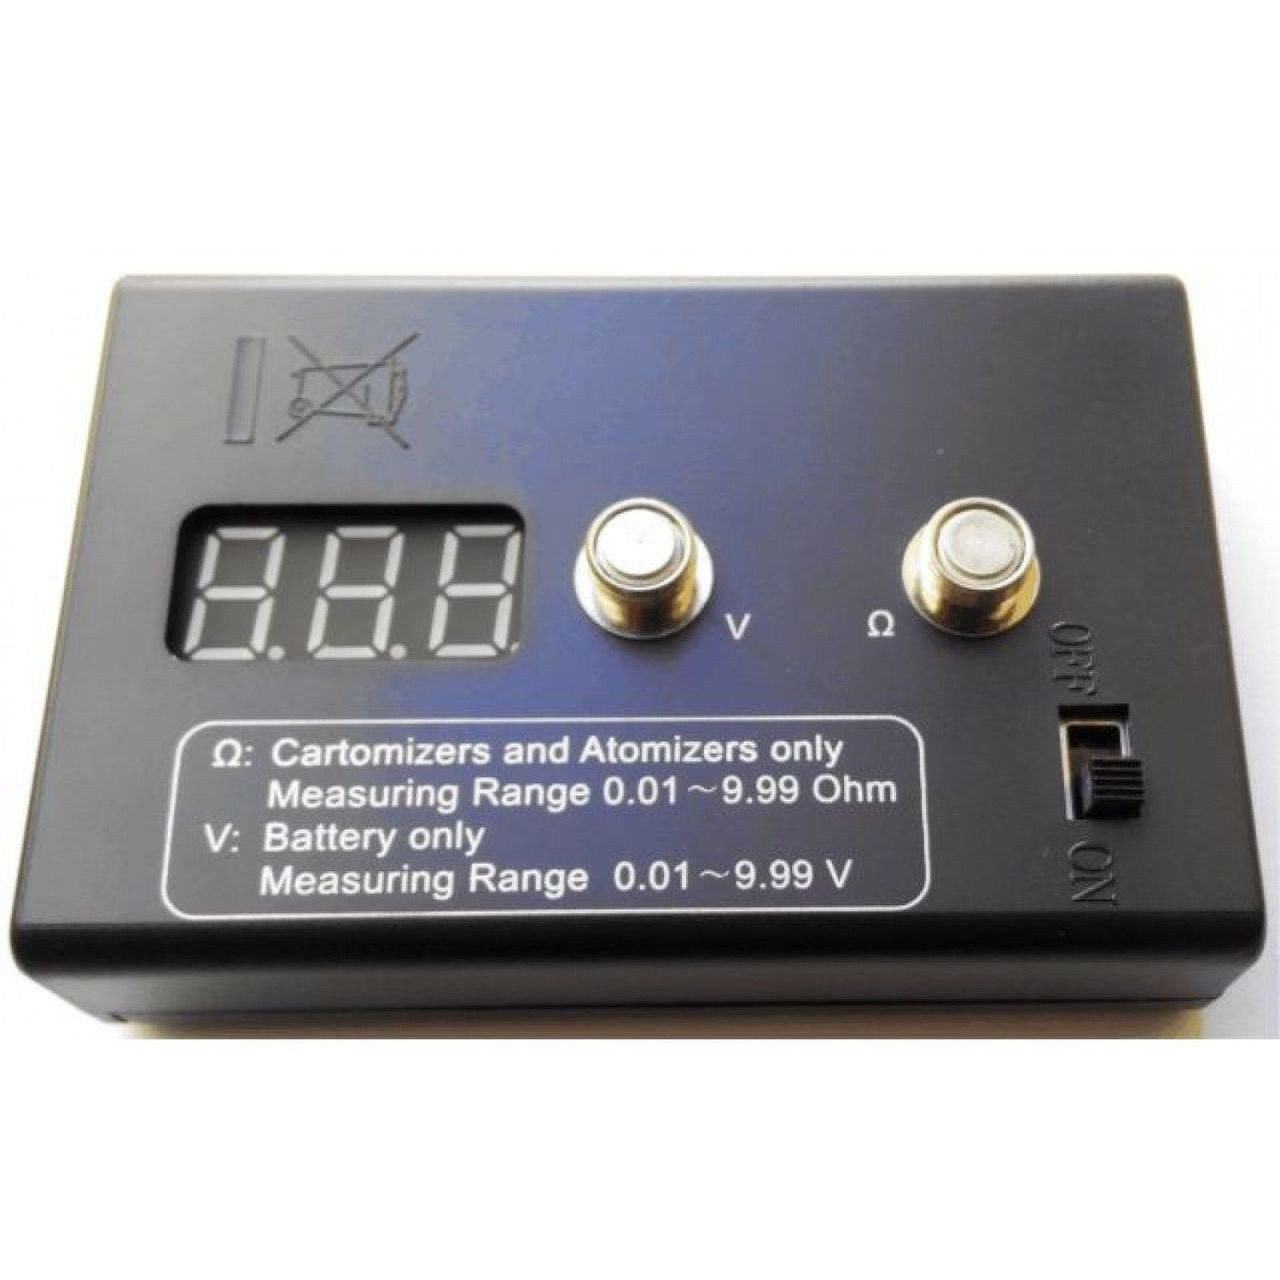
An ohm/volt reader, also known as an ohm meter, is a
device that measures the resistance (in ohms) and voltage of your vape coils
and batteries. It is an indispensable tool for anyone building their own coils
or using rebuildable atomizers (RBAs). Understanding these measurements helps
ensure your vaping setup is safe and functioning optimally.
Now, the importance of using one are the following:
1.Safety:
Measuring the resistance of your coils is vital to avoid short circuits, which
can lead to battery failure or even explosions. Ensuring your coils are within
safe limits prevents potential hazards.
2.Performance:
Correct resistance levels ensure that your device is operating efficiently. It
helps in achieving the desired vape quality, including flavor and vapor
production.
3.Battery Life:
Using an ohm/volt reader can help you manage your battery’s voltage, ensuring
you don’t over-drain or overcharge it, thereby extending its lifespan.
Obviously, knowing the components of your ohm/volt
reader will make it easier to use:
- Display
Screen: Shows the resistance and voltage
readings. - Connection
Ports: Usually 510-threaded, where you screw in your
atomizer or battery for measurement. - Power
Button: Turns the device on or off. - Switch
Button: Switches between ohm and volt
readings if the device offers both measurements.
Step-by-Step Guide to Using an Ohm/Volt Reader
Now that you know what an ohm/volt reader is and how
it’s overall purpose, we can now cover how to properly use it.
Step 1: Preparing Your Device
Before using the ohm/volt reader, ensure your vape
device and the reader are both powered off. Clean the connection ports to avoid
any dirt or residue that might affect the readings.
Step 2: Attaching the Atomizer
1.Remove the Atomizer:
Unscrew the atomizer (tank) from your vape mod.
2.Attach to the Reader:
Screw the atomizer onto the connection port of the ohm/volt reader. Ensure it is
securely attached but do not overtighten.
Step 3: Measuring the Resistance (Ohms)
1.Power On:
Turn on the ohm/volt reader using the power button.
2.Read the Display:
The display screen will show the resistance of the coil in ohms. Ensure the
reading is within the safe range recommended for your device and battery.
Step 4: Measuring the Voltage
1.Switch Mode:
If your reader measures both ohms and volts, switch to voltage mode using the
switch button.
2.Attach the Battery:
For voltage measurement, attach the battery to the reader if it has a dedicated
battery port.
3.Read the Display:
The screen will show the voltage of your battery. A fully charged 18650
battery, for example, typically shows around 4.2 volts.
Step 5: Interpretation and Adjustment
1.Interpret Readings:
Compare the readings with the specifications of your device and battery. If the
resistance is too low, it could indicate a potential short circuit.
2.Make Adjustments:
If the readings are not within the safe or desired range, adjust your coils or
battery usage accordingly. For instance, if the resistance is too low, you
might need to rebuild the coil.
Tips for Accurate Readings
1.Clean Connections:
Always ensure the connection points are clean for accurate readings.
2.Check Regularly:
Regularly check the resistance of your coils, especially if you notice changes
in your vaping experience.
3.Use Quality Batteries:
Using high-quality, authentic batteries reduces the risk of inaccurate voltage
readings and potential hazards.
Common Mistakes to Avoid
1.Overtightening:
Do not overtighten the atomizer or battery onto the reader as it can damage the
threads or affect the readings.
2.Ignoring Safety Limits:
Always adhere to the safety limits of your device. Ignoring low resistance
readings can lead to dangerous situations.
3.Neglecting Regular Checks:
Failing to regularly check your coils and batteries can lead to unexpected
issues.
Advanced Uses of an Ohm/Volt Reader
Rebuilding Coils
For vapers who build their own coils, an ohm/volt
reader is indispensable. It ensures the coils are built to the correct
resistance, enhancing safety and performance.
1.Building Coils:
After building, use the ohm reader to check the resistance before attaching the
coil to your vape device.
2.Dry Burn Test:
Attach the coil to a regulated mod, perform a dry burn to check for hot spots,
then reattach to the ohm reader to ensure the resistance hasn’t changed.
Diagnosing Device Issues
An ohm/volt reader can help diagnose issues with your
vape setup. For instance, if you’re experiencing poor performance or
irregularities in vaping:
1.Check Coil Resistance:
Measure the coil resistance to see if it’s within the expected range.
2.Check Battery Voltage:
Measure the battery voltage to ensure it is adequately charged.
Having an Ohm/Volt Reader Can Make a Difference!
Using an ohm/volt reader is crucial for any serious
vaper, especially those who build their own coils or use advanced vaping
setups. This device not only ensures safety but also enhances the overall
vaping experience by providing accurate measurements for optimal performance.
By following the steps and tips outlined in this guide, you can confidently use
an ohm/volt reader to maintain and improve your vaping equipment.
Regular use of an ohm/volt reader can prevent
potential hazards, extend the life of your batteries, and ensure that your vape
device operates at its best. Whether you’re a beginner or an experienced vaper,
understanding and utilizing this tool is a step towards safer and more
enjoyable vaping.
Leave a Reply